最近又重新拾起了React框架,并配合开源模板gentelella以及Redux建立了个简单的项目。《React-Redux使用笔记》系列用于记录过程中的一些使用和解决方法。
本文记录创建Top组件的过程。
Top组件
上一节我们引入了Redux,项目结构进行了大调整,可能小伙伴们会觉得一脸迷糊。这里我们通过添加个小的Top组件再来细讲一下Redux在React中的使用吧。
Top组件功能
- 收起左侧列表
我们将添加一个状态isSidebarShown,来记录左侧列表的状态。
- 退出登录
我们将重置状态userName,并退出应用。
添加action
这里我们先添加isSidebarShown状态相关的action和action创建函数:
1 2 3 4 5
| export const TOGGLE_SIDEBAR = 'TOGGLE_SIDEBAR' export function toggleSidebar(state) { return { type: TOGGLE_SIDEBAR, state } }
|
添加reducer
然后我们添加isSidebarShown状态相关的reducer:
1 2 3 4 5 6 7 8 9 10 11 12 13 14 15 16
| import { USER_NAME, TOGGLE_SIDEBAR } from '../actions/commonActions' function isSidebarShown(state = true, action) { switch (action.type) { case TOGGLE_SIDEBAR: return action.state default: return state } } const AppReducer = combineReducers({ isSidebarShown, userName })
|
添加Top组件
我们约定,页面结构相关的组件放置在components文件中,路由相关的组件放置在modules中。
这里我们在routes/home/components文件夹下新增Top.jsx组件:
1 2 3 4 5 6 7 8 9 10 11 12 13 14 15 16 17 18 19 20 21 22 23 24 25 26 27 28 29 30 31 32 33 34 35 36 37 38 39 40 41 42 43 44 45 46
| import React, { Component, PropTypes } from 'react' import { toggleSidebar, setUserName } from '../../../actions/commonActions.js' export class Top extends Component { render() { const { dispatch, isSidebarShown } = this.props return ( <div className="top_nav"> <div className="nav_menu"> <nav> <div className="nav toggle"> <a id="menu_toggle" onClick={() => { dispatch(toggleSidebar(isSidebarShown() ? false : true)); $('body').toggleClass('nav-md nav-sm') } }><i className="fa fa-bars"></i></a> </div> <ul className="nav navbar-nav navbar-right"> <li className=""> <a href="javascript:;" className="user-profile dropdown-toggle" data-toggle="dropdown" aria-expanded="false"> 用户 <span className=" fa fa-angle-down"></span> </a> <ul className="dropdown-menu dropdown-usermenu pull-right"> <li><a href="javascript:;">设置</a></li> <li><a onClick={() =>{this.logout()}}><i className="fa fa-sign-out pull-right"></i>退出</a></li> </ul> </li> </ul> </nav> </div> </div> ) } logout(){ this.props.dispatch(setUserName(null)) this.context.router.push('/login') } } Top.contextTypes = { router: React.PropTypes.object } export default Top
|
HomeContainer传入状态
这里相关状态我们统一从HomeContainer组件中传入:
1 2 3 4 5 6 7 8 9 10 11 12 13 14 15 16 17 18 19 20 21 22 23 24 25 26 27 28 29 30 31 32 33 34 35 36 37 38 39 40 41 42 43 44 45 46 47 48 49 50 51 52 53 54 55 56 57 58
| import React, { Component, PropTypes } from 'react' import { connect } from 'react-redux' import Top from '../components/Top.jsx' export class HomeContainer extends Component { render() { const that = this const { dispatch, isSidebarShown } = that.props return ( <div className="container body"> <div className="main_container"> <Top dispatch={dispatch} isSidebarShown={isSidebarShown}></Top> <div className="right_col" role="main"> Hello World! </div> <footer> <div className="pull-right"> @godbasin </div> <div className="clearfix"></div> </footer> </div> </div> ) } componentDidMount() { if (this.props.getUserName() === null) { Notify({ title: '请先登录', type: 'error' }) this.context.router.push('/login') } $('body').attr('class', 'nav-md') $('.right_col').css('min-height', $(window).height()) } } HomeContainer.contextTypes = { router: React.PropTypes.object } function connectState(state) { return { getUserName() { return state.userName }, isSidebarShown() { return state.isSidebarShown } } } export default connect(connectState)(HomeContainer)
|
至此,我们的Top组件就可以使用啦。
会话状态
前面为了展示redux的使用,我们将登录信息也做到状态里面,但其实这样是很不合理的,因为我们刷新一下页面就会退出了呢。
使用sessionStorage保存登录信息
sessionStorage也是本骚年用的最经常的一种保存会话信息的方法。
我们需要调整的代码如下:
1 2 3 4 5 6 7 8 9 10 11 12 13 14 15 16 17 18 19 20 21 22
| import { TOGGLE_SIDEBAR } from '../actions/commonActions' const AppReducer = combineReducers({ isSidebarShown })
|
1 2 3 4 5 6 7 8 9 10
| sessionStorage.setItem('username', username) export default Login
|
1 2 3 4 5 6 7 8 9 10 11 12 13 14
| function connectState(state) { return { return state.userName },*/ isSidebarShown() { return state.isSidebarShown } } } if (!sessionStorage.getItem('username')){ ... }
|
1 2 3
| sessionStorage.removeItem('username')
|
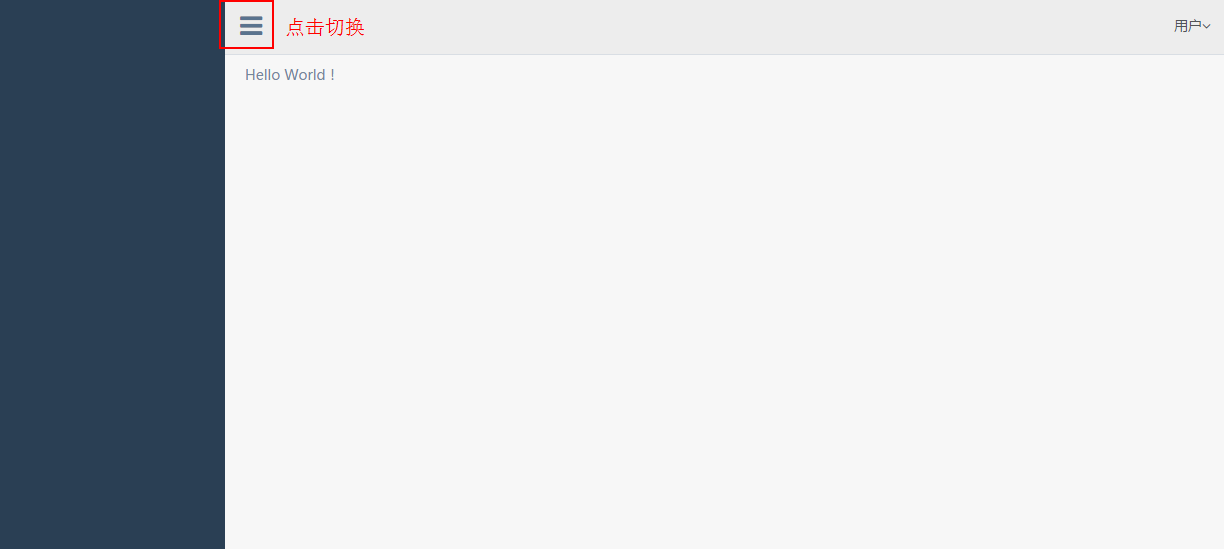
调整后的功能终于符合逻辑了呢,现在我们的页面大概效果如图:

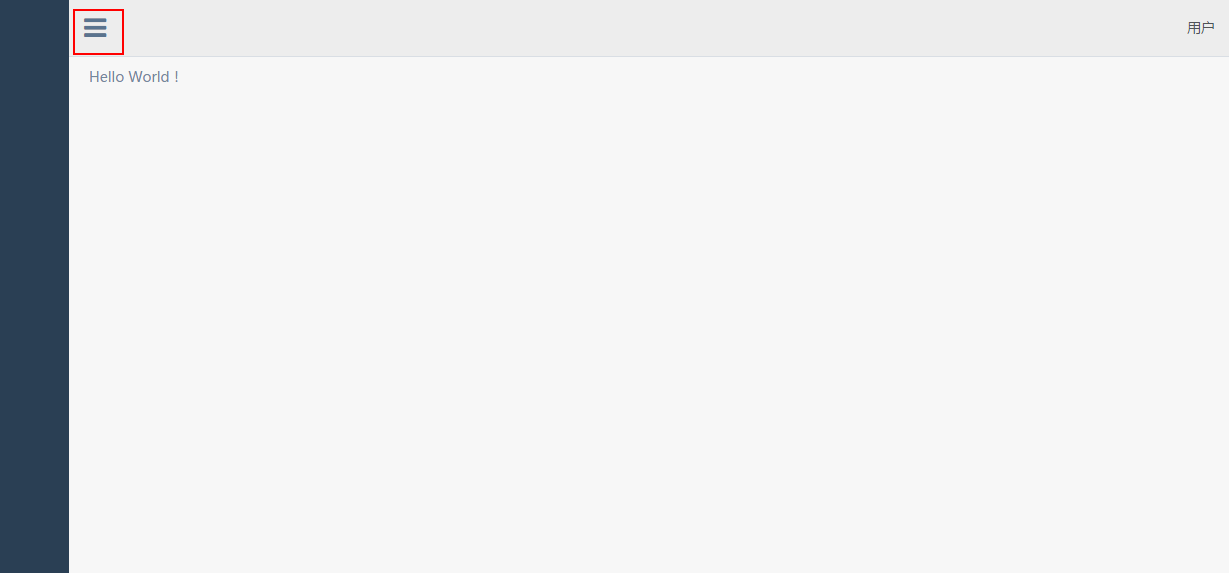
切换后:

结束语
本节我们通过新增一个Top组件,感受了一下在Redux状态管理下,新加状态的一些具体步骤,这样或许比上一节整体调整结构要稍微清晰一点点吧。
此处查看项目代码
此处查看页面效果
查看Github有更多内容噢:https://github.com/godbasin
更欢迎来被删的前端游乐场边撸猫边学前端噢


