AngularJS(v1.5.8)已经成为项目们的基本框架,《玩转Angular1》系列用于记录项目中的一些好玩或者比较特别的思路。
本文记录在angular中使用ui-router建立嵌套路由,以及路由状态相关的过程。
ui-router
ui-router与ngRoute
angular.js为我们封装好了一个路由工具ngRoute,它靠url改变去驱动视图。
angularUI也为我们封装了一个独立的路由模块ui-router,它靠状态state来驱动视图。
- 两者区别
- UI-Router支持嵌套视图,ngRoute不支持
- UI-Router支持多视图,ngRoute不支持
- UI-Router是应用程序内的一个区域,ngRoute只是应用程序中的url
- UI-Router名称可以自定义,ngRoute名称只能是url
- UI-Router通过名称或url导航,ngRoute只能通过url导航
- UI-Router通过状态填充某一部件,ngRoute通过指令将填充某一部件
使用ui-router
管理状态
- 在应用程序的整个用户界面和导航中,一个状态对应于一个页面位置
- 通过定义controller、template和view等属性,来定义指定位置的用户界面和界面行为
- 通过嵌套的方式来解决页面中的一些重复出现的部位
嵌套状态和视图
- 当一个状态是活动状态时,其所有的父状态都将成为活跃状态
- 状态可以相互嵌套
这里主要参考《学习 ui-router 系列文章》,后面我们会在使用到的时候再简单讲解相关的内容。
像其他几个框架讲解一样,我们依然使用Sidebar组件进行应用程序主界面的侧边栏。
如图:
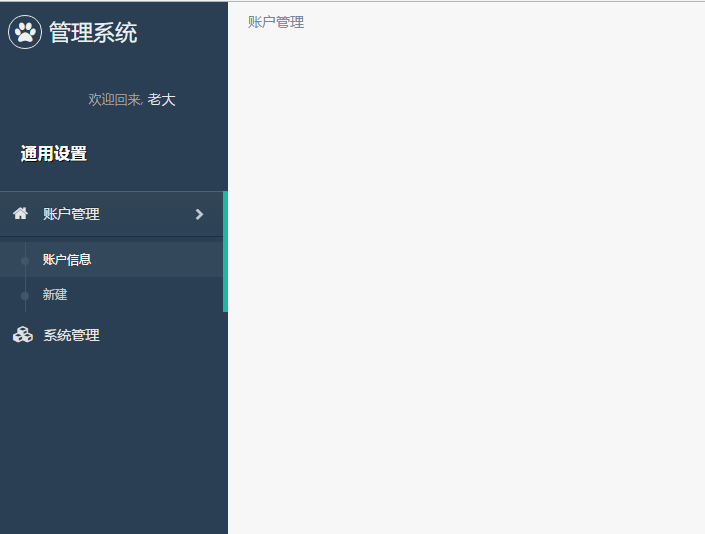
这里我们在维护公用组件的时候,放置在app/shared/components文件夹里。
1 2 3 4 5 6 7 8 9 10 11 12 13 14 15 16 17
| ... <ul class="nav side-menu"> <li ng-repeat="menu in menus" ng-class="(menu.href === $state.current.name || menu.show) ? 'active' : ''" ng-click="toggleMenu(menu)"> <a><i class="fa" ng-class="menu.icon"></i> {{menu.text}} <span class="fa" ng-show="menu.childMenus && menu.childMenus.length" ng-class="menu.class ? 'fa-chevron-down' : 'fa-chevron-right'"></span></a> <ul class="nav child_menu slide" ng-click="$event.stopPropagation();" ng-show="menu.show"> <li ng-repeat="childMenu in menu.childMenus" class="slide-item" ui-sref-active="current-page"> <a ui-sref="{{ childMenu.href }}">{{ childMenu.text }}</a> </li> </ul> </li> </ul> ...
|
这里我们只把关键部分进行展示,如菜单遍历、状态加载、下拉处理等等。
从代码中我们可以发现,模板中涉及两个在ui-router中比较关键的属性:
另外,我们这里使用到了$state,这个其实是从控制器传入的,属于ui-router的状态管理,下面我们会讲到。
1 2 3 4 5 6 7 8 9 10 11 12 13 14 15 16 17 18 19 20 21 22 23 24 25 26 27 28 29 30 31 32 33 34 35 36 37 38 39 40 41 42 43 44 45 46 47 48 49 50 51 52 53 54 55 56 57
| export default (ngModule) => { ngModule.directive('sidebar', ['$state', function ($state) { return { restrict: 'AE', templateUrl: './shared/components/sidebar.template.html', transclude: true, replace: false, link(scope, element, attrs) { const menuShowAll = false; scope.$state = $state; const menus = [{ icon: 'fa-home', text: '账户管理', show: false, childMenus: [{ href: 'home.accounts', text: '账户信息' }, { href: 'home.accountsadd', text: '新建' }] }, { icon: 'fa-cubes', text: '系统管理', show: false, href: 'home.system' }]; scope.menus = menus; scope.toggleMenu = menu => { scope.menus.forEach(m => m.show = false); if (menu.childMenus && menu.childMenus.length) { menu.show = !menu.show; } else if (menu.href) { $state.go(menu.href); } }; checkActive(); function checkActive() { menus.forEach((menu: any) => { menu.show = !!(menu.childMenus && menu.childMenus.find(item => item.href === $state.current.name)); }); } } }; }]); };
|
在控制器中,我们主要做了以下几件事:
- 初始化菜单数据
- 设置一级菜单点击的事件:切换下拉/跳转
- 初始化时检测并记载菜单状态
这里面主要用到ui-router的$state服务,该服务主要用于状态管理。
嵌套路由
该应用中,主要的嵌套路由使用,在登录后的home主界面。
添加路由状态
在app.ts文件中,我们添加路由状态处理:
1 2 3 4 5 6 7 8 9 10 11 12 13 14 15 16 17 18 19 20 21 22 23 24
| const routerStates = [{ name: 'login', url: '/login', templateUrl: './modules/login/login.template.html', controller: 'LoginCtrl' }, { name: 'home', url: '/home', templateUrl: './modules/home/home.template.html' }, { name: 'home.accounts', url: '/accounts', templateUrl: './modules/home/account/account.template.html' }, { name: 'home.accountsadd', url: '/accountsadd', templateUrl: './modules/home/account/accountAdd.template.html' }, { name: 'home.system', url: '/system', templateUrl: './modules/home/system/system.template.html' }];
|
状态可以相互嵌套。有三个嵌套的方法:
- 使用“点标记法”,例如:
.state('contacts.list', {})
- 使用parent属性,指定一个父状态的名称字符串,例如:
parent: 'contacts'
- 使用parent属性,指定一个父状态对象,例如:
parent: contacts(contacts 是一个状态对象)
在home.template.ts中嵌套路由视图
子状态将把其对应的模板加载到父状态对应模板的ui-view中。
1 2 3 4 5 6 7 8 9 10 11 12 13 14
| <div class="container body"> <div class="main_container"> <div sidebar></div> <div class="right_col" role="main"> <div ui-view></div> </div> <footer>...</footer> </div> </div>
|
这样,我们就实现了路由嵌套,以及路由跳转、状态激活等功能。
结束语
这节主要简单介绍了使用ui-router代替ngRoute,并通过创建Sidebar组件以及添加路由、嵌套视图等,展示ui-router特性。
此处查看项目代码
此处查看页面效果
查看Github有更多内容噢:https://github.com/godbasin
更欢迎来被删的前端游乐场边撸猫边学前端噢

